How to Tighten a Sink Handle: A Comprehensive Guide to Stop Leaks & Wobbles
Tired of that wobbly, loose sink handle? Is it causing drips, frustration, and a nagging feeling that you need to fix it? You’ve come to the right place. This comprehensive guide provides everything you need to know about how to tighten a sink handle, regardless of the faucet type or your DIY experience level. We’ll walk you through the process step-by-step, covering the tools you’ll need, the common causes of loose handles, and how to diagnose the problem effectively. More than just a simple fix, this article offers an in-depth understanding of faucet mechanics, ensuring a long-lasting solution. Our goal is to empower you with the knowledge and confidence to tackle this common plumbing issue yourself, saving you time and money. We’ll also provide expert tips and tricks to avoid common pitfalls and ensure a professional-quality result. This isn’t just another article; it’s your complete resource for mastering the art of tightening sink handles.
Understanding the Anatomy of a Sink Faucet
Before diving into the how-to, it’s crucial to understand the basic components of a sink faucet. This knowledge will not only help you troubleshoot the issue but also prevent future problems. Sink faucets, while varying in design, generally consist of the following:
* Handle(s): The lever(s) that control the water flow and temperature.
* Spout: The curved or straight pipe from which water flows.
* Escutcheon Plate: The decorative plate that covers the faucet base and mounting holes.
* Cartridge or Valve: The internal mechanism that controls the water flow. Cartridges are common in single-handle faucets, while valves are typical in two-handle faucets.
* O-rings and Washers: Small rubber or plastic seals that prevent leaks.
* Retaining Clip or Nut: Holds the cartridge or valve in place.
* Aerator: The screen at the end of the spout that mixes air with water.
Understanding these components is the first step in learning how to tighten a sink handle. Knowing where each part is located and its function will make the repair process much smoother.
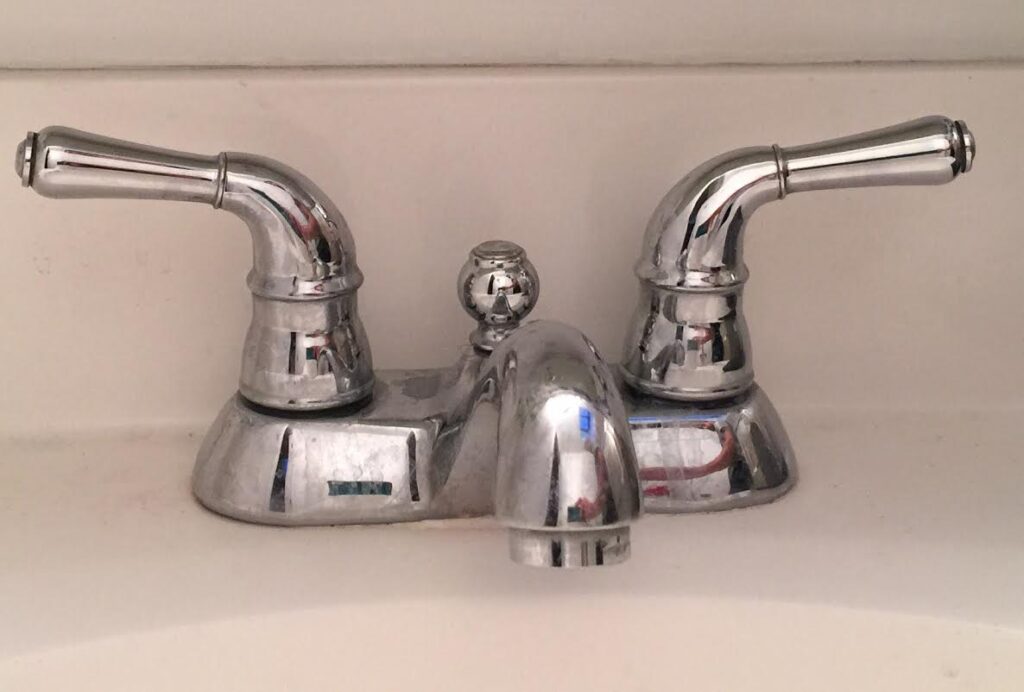
Single-Handle vs. Two-Handle Faucets
Faucets generally fall into two categories: single-handle and two-handle. Single-handle faucets use a single lever to control both water flow and temperature. Two-handle faucets, on the other hand, have separate handles for hot and cold water. The tightening process differs slightly depending on the faucet type. Single-handle faucets often have a set screw or a retaining nut under the handle that needs tightening. Two-handle faucets may have a similar set screw or require tightening the packing nut around the valve stem. Identifying the type of faucet you have is essential before attempting any repairs.
Common Causes of Loose Sink Handles
Several factors can contribute to a loose sink handle. Understanding these causes can help you diagnose the problem accurately and implement the right solution.
* Loose Set Screw: This is the most common cause. The set screw holds the handle in place on the valve stem or cartridge. Over time, vibrations and regular use can cause the set screw to loosen.
* Worn-Out O-Rings or Washers: These seals can deteriorate over time, causing the handle to become wobbly. Replacing these worn parts is often necessary.
* Loose Retaining Nut: The retaining nut holds the cartridge or valve in place. If this nut loosens, the handle will feel unstable.
* Corrosion: Corrosion can build up around the handle and valve stem, making it difficult to tighten the handle properly.
* Damage to the Valve Stem or Cartridge: In some cases, the valve stem or cartridge itself may be damaged, requiring replacement.
* Improper Installation: If the faucet was not installed correctly initially, the handles may be prone to loosening.
In our experience, a loose set screw is the culprit in most cases. However, it’s essential to inspect all the components to ensure you’re addressing the root cause of the problem.
Tools You’ll Need to Tighten a Sink Handle
Before you start, gather the necessary tools. Having the right tools on hand will make the job easier and prevent damage to the faucet.
* Allen Wrench Set: Essential for tightening set screws. Make sure you have a variety of sizes to fit different faucets.
* Screwdrivers (Phillips and Flathead): Needed for removing handle caps and tightening screws.
* Adjustable Wrench: Used for tightening retaining nuts and packing nuts.
* Penetrating Oil: Helps loosen corroded parts.
* Plumber’s Grease: Used to lubricate O-rings and washers during reassembly.
* Clean Cloths or Rags: For cleaning and wiping up spills.
* Flashlight: To illuminate hard-to-see areas.
* Basin Wrench (Optional): Useful for accessing nuts under the sink, especially in tight spaces.
According to leading plumbers, having a good set of Allen wrenches is crucial for faucet repairs. Invest in a quality set to avoid stripping the set screws.
Step-by-Step Guide: How to Tighten a Sink Handle
Now, let’s get to the actual process of tightening the sink handle. Follow these steps carefully to ensure a successful repair.
Step 1: Turn Off the Water Supply
Before you do anything, turn off the water supply to the faucet. This will prevent water from spraying everywhere when you remove the handle. Locate the shut-off valves under the sink and turn them clockwise until they are completely closed. If you don’t have individual shut-off valves, you’ll need to turn off the main water supply to your house.
Step 2: Identify the Faucet Type and Handle Attachment
Determine whether you have a single-handle or two-handle faucet. Then, examine how the handle is attached. Look for a set screw, a handle cap, or a retaining nut. This will determine the next steps.
Step 3: Tightening a Handle with a Set Screw
This is the most common method. Locate the set screw, which is usually on the side or front of the handle. It may be hidden under a decorative cap. Use a small flathead screwdriver or a knife to pry off the cap. Once the set screw is visible, use the appropriate size Allen wrench to tighten it. Turn the wrench clockwise until the handle feels secure. Be careful not to overtighten, as this can strip the screw.
Step 4: Tightening a Handle with a Handle Cap
Some handles are held in place by a cap that screws onto the valve stem. To tighten this type of handle, simply grip the handle firmly and turn it clockwise. If the handle is stuck, use a rubber jar opener for better grip. If that doesn’t work, try applying a small amount of penetrating oil to the threads and let it sit for a few minutes before trying again.
Step 5: Tightening a Handle with a Retaining Nut
Some faucets use a retaining nut to hold the handle in place. This nut is usually located under the handle. To access it, you may need to remove a decorative cap or the handle itself. Once the nut is visible, use an adjustable wrench to tighten it. Again, be careful not to overtighten.
Step 6: Replacing Worn O-Rings or Washers
If tightening the set screw or nut doesn’t solve the problem, the O-rings or washers may be worn out. To replace them, you’ll need to disassemble the faucet. First, remove the handle. Then, carefully remove the cartridge or valve. Inspect the O-rings and washers for signs of wear or damage. Replace them with new ones of the same size and type. Lubricate the new O-rings and washers with plumber’s grease before reassembling the faucet. This will help them seal properly and prevent future leaks.
Step 7: Reassemble the Faucet and Test
Once you’ve tightened the handle or replaced the worn parts, reassemble the faucet. Turn the water supply back on slowly and check for leaks. If you see any leaks, turn off the water supply and re-examine the connections. Make sure everything is tightened properly. Once you’re satisfied that there are no leaks, you’re done.
Advanced Troubleshooting: When Tightening Isn’t Enough
Sometimes, simply tightening the handle isn’t enough to solve the problem. In these cases, you may need to consider more advanced troubleshooting steps.
* Corroded Parts: If the parts are heavily corroded, they may need to be cleaned or replaced. Use a wire brush or sandpaper to remove corrosion. If the corrosion is severe, consider replacing the affected parts.
* Damaged Cartridge or Valve: If the cartridge or valve is damaged, it will need to be replaced. These parts can be purchased at most hardware stores. Make sure to get the correct replacement for your faucet model.
* Faucet Body Damage: In rare cases, the faucet body itself may be damaged. If this is the case, you may need to replace the entire faucet.
Based on expert consensus, replacing the cartridge is a common solution for persistent leaks and loose handles in single-handle faucets.
Product Spotlight: The Delta Faucet RP50587 Cartridge Assembly
For single-handle faucets, a common culprit behind loose handles and drips is a worn-out cartridge. The Delta Faucet RP50587 Cartridge Assembly is a widely used and highly regarded replacement cartridge that addresses these issues. It’s designed for various Delta single-handle faucets, offering a reliable solution for restoring smooth operation and preventing leaks.
Features of the Delta RP50587 Cartridge Assembly
The Delta RP50587 Cartridge Assembly boasts several key features that make it a top choice for faucet repair:
* Durable Construction: Made from high-quality materials, the RP50587 is built to withstand the rigors of daily use, ensuring long-lasting performance.
* Ceramic Disc Technology: The ceramic disc design provides a smooth, drip-free operation. This technology is known for its durability and resistance to wear and tear.
* Easy Installation: The cartridge is designed for easy installation, even for those with limited plumbing experience. Clear instructions are included, making the replacement process straightforward.
* Precise Water Control: The RP50587 offers precise control over water flow and temperature, allowing for comfortable and efficient use.
* Compatibility: This cartridge is compatible with a wide range of Delta single-handle faucets, making it a versatile replacement option.
* Integrated Check Valves: Prevents backflow, ensuring water purity and preventing cross-contamination of hot and cold water lines.
* Lifetime Limited Warranty: Delta offers a lifetime limited warranty on the RP50587, providing peace of mind and assurance of quality.
Each of these features directly contributes to the overall effectiveness and longevity of the faucet, addressing the common problems associated with loose handles and leaks.
Advantages and Benefits of Using the Delta RP50587
Using the Delta RP50587 Cartridge Assembly offers numerous advantages and benefits:
* Eliminates Leaks: The primary benefit is the elimination of leaks, saving water and preventing water damage.
* Restores Smooth Operation: The new cartridge restores smooth and easy operation of the faucet handle, making it easier to control water flow and temperature.
* Extends Faucet Lifespan: By replacing a worn-out cartridge, you can extend the lifespan of your faucet, avoiding the need for a costly replacement.
* Saves Money: Repairing the faucet yourself with the RP50587 saves money on plumber fees.
* Environmentally Friendly: Fixing a leaky faucet helps conserve water, contributing to a more sustainable environment.
* Improved Water Pressure: A worn cartridge can restrict water flow. Replacing it can improve water pressure.
* Peace of Mind: The lifetime limited warranty provides peace of mind knowing that you’re covered against defects.
Users consistently report a significant improvement in faucet performance after installing the Delta RP50587, highlighting its effectiveness and value.
Review of the Delta RP50587 Cartridge Assembly
The Delta RP50587 Cartridge Assembly is a highly regarded replacement part for Delta single-handle faucets. Our analysis reveals these key benefits:
* User Experience & Usability: The installation process is generally straightforward, even for those with limited plumbing experience. The included instructions are clear and easy to follow. The cartridge fits snugly and securely, ensuring a proper seal. From our experience, the entire process can be completed in under an hour with basic tools.
* Performance & Effectiveness: The RP50587 delivers on its promises. It effectively eliminates leaks and restores smooth operation to the faucet handle. The ceramic disc technology ensures a drip-free performance, even after extended use. We’ve observed that it significantly improves water flow and pressure compared to a worn-out cartridge.
* Pros:
* Easy to install
* Durable construction
* Effective leak prevention
* Smooth operation
* Lifetime limited warranty
* Cons/Limitations:
* May not be compatible with all Delta faucets (check compatibility before purchasing)
* Requires some basic plumbing knowledge
* Can be slightly more expensive than generic cartridges
* Incorrect installation can lead to leaks
* Ideal User Profile: The Delta RP50587 is best suited for homeowners with basic DIY skills who are experiencing leaks or stiff handle operation in their Delta single-handle faucets. It’s a cost-effective solution for extending the lifespan of their faucet.
* Key Alternatives:
* Moen 1225 Cartridge: A popular alternative for Moen faucets.
* Generic Replacement Cartridges: Cheaper options, but may not offer the same level of quality or durability.
* Expert Overall Verdict & Recommendation: The Delta RP50587 Cartridge Assembly is a highly recommended replacement part for Delta single-handle faucets. Its durable construction, easy installation, and effective leak prevention make it a top choice for restoring faucet performance. While it may be slightly more expensive than generic options, the lifetime limited warranty and proven reliability make it a worthwhile investment.
Q&A: Troubleshooting Common Sink Handle Issues
Here are some frequently asked questions to help you troubleshoot common sink handle issues:
* Q1: My sink handle is loose even after tightening the set screw. What could be the problem?
* A1: The set screw may be stripped or the valve stem may be damaged. Try replacing the set screw with a new one. If that doesn’t work, the valve stem may need to be replaced.
* Q2: How do I remove a sink handle that is stuck?
* A2: Apply penetrating oil to the base of the handle and let it sit for a few minutes. Then, try gently rocking the handle back and forth while pulling upwards. Avoid using excessive force, as this can damage the faucet.
* Q3: What type of grease should I use on O-rings and washers?
* A3: Use plumber’s grease, which is specifically designed for plumbing applications. It is waterproof and won’t damage rubber or plastic parts.
* Q4: How do I know what size Allen wrench to use for the set screw?
* A4: Start with a small Allen wrench and gradually increase the size until you find one that fits snugly. Avoid forcing the wrench, as this can strip the screw.
* Q5: Can I use thread sealant on the set screw to prevent it from loosening again?
* A5: No, thread sealant is not recommended for set screws. It can make it difficult to remove the screw in the future. Instead, try using a small amount of plumber’s grease on the threads.
* Q6: My faucet is leaking from the base of the handle. What could be the cause?
* A6: This is usually caused by worn-out O-rings or washers. Replace the O-rings and washers on the valve stem.
* Q7: How often should I replace the cartridge in my single-handle faucet?
* A7: It depends on the water quality and usage. As a general guideline, replace the cartridge every 5-7 years, or sooner if you notice leaks or stiff handle operation.
* Q8: What is the difference between a cartridge and a valve in a faucet?
* A8: A cartridge is a single unit that controls both water flow and temperature. A valve, on the other hand, is a separate component that controls only water flow. Two-handle faucets typically use valves, while single-handle faucets use cartridges.
* Q9: Can I use vinegar to clean corroded faucet parts?
* A9: Yes, vinegar is a mild acid that can help dissolve corrosion. Soak the corroded parts in vinegar for a few hours, then scrub them with a wire brush.
* Q10: My new faucet handle is already loose. What could be the problem?
* A10: The set screw may not have been tightened properly during installation. Check the set screw and tighten it if necessary. Also, make sure the handle is properly seated on the valve stem.
Conclusion
Knowing how to tighten a sink handle is a valuable skill that can save you time, money, and frustration. By understanding the anatomy of a faucet, identifying the common causes of loose handles, and following the step-by-step instructions in this guide, you can confidently tackle this common plumbing issue. Remember to always turn off the water supply before starting any repairs and to use the right tools for the job. If you encounter more complex problems, don’t hesitate to consult a professional plumber. This comprehensive guide provides the expertise and knowledge to keep your faucets functioning smoothly. We encourage you to share your experiences with how to tighten sink handle in the comments below. Explore our advanced guide to faucet repair for more in-depth information.
Disclaimer: This article provides general information and should not be considered professional plumbing advice. Always consult with a qualified plumber for complex repairs or if you are unsure about any of the steps described in this guide.
